How To Remove All Red Lines In Word 2016
Put your cursor in the textbox of Find what and click More then select White Space in Special Or you can simply press Space key in the textbox. If you cant select a line to delete it might actually be a horizontal line which is a type of border.
How To Remove Red And Green Wavy Underlines In Word Document
For further detail see my 2016-12-02 comment below.
How to remove all red lines in word 2016. In the toolbar at the top of the screen click the Review tab. To remove the redundant spaces and blank lines in Word Find and Replace can do a better job than reformatting manually. A box will appear.
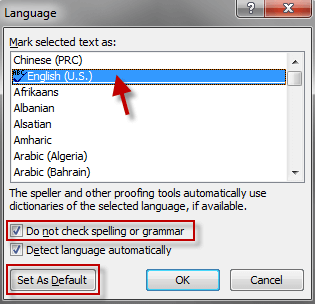
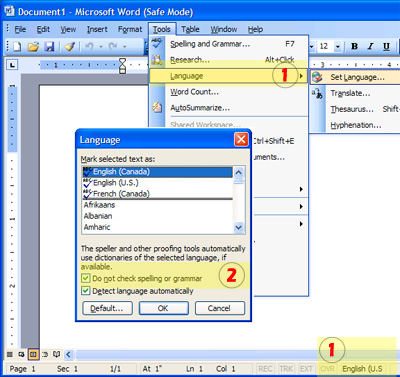
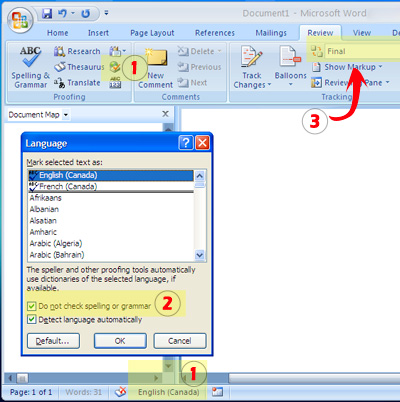
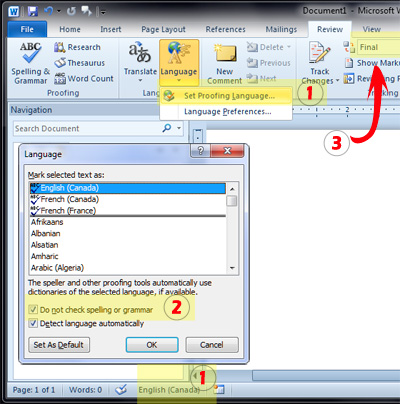
Remove All Red and Green Underlines from Word Document. Click on the name of the language in the status bar at the bottom of the screen. Delete lines or connectors.
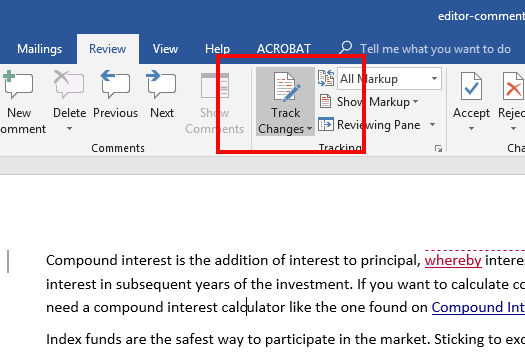
To remove double-line strikethrough formatting select the text and then go to Home and select Strikethrough twice in the Font group. Click on Options it should be the last option on your left hand side 4. This tab contains tools to help with spell checking and editing including the Track Changes feature.
How do I get rid of these lines. Lets see how to achieve it. I have a sheet in Excel that contains shapes with text in them.
Open MS Word 2. Check the Develop option. Good day all Thanks for taking the time.
If you dont want to see the red wavy underlines on-screen you can turn this feature off by three simple clicks. Click the line connector or shape that you want to delete and then press Delete. The texts in these shapes are not misspelled.
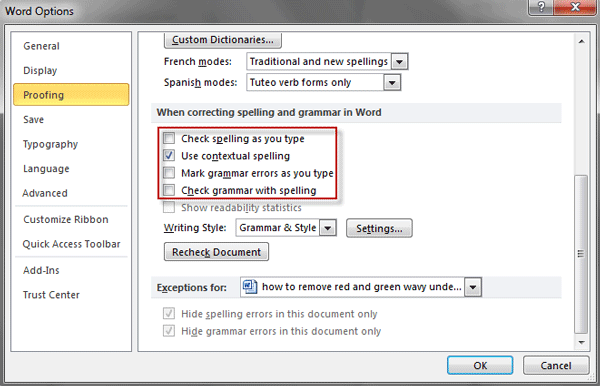
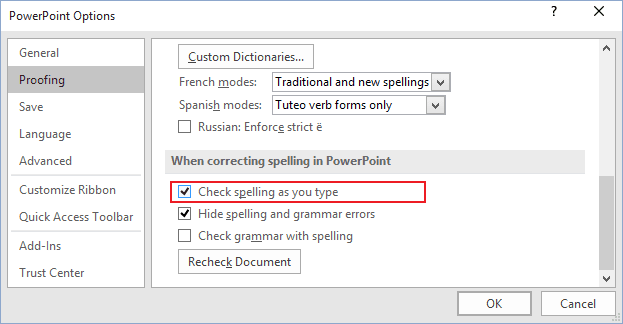
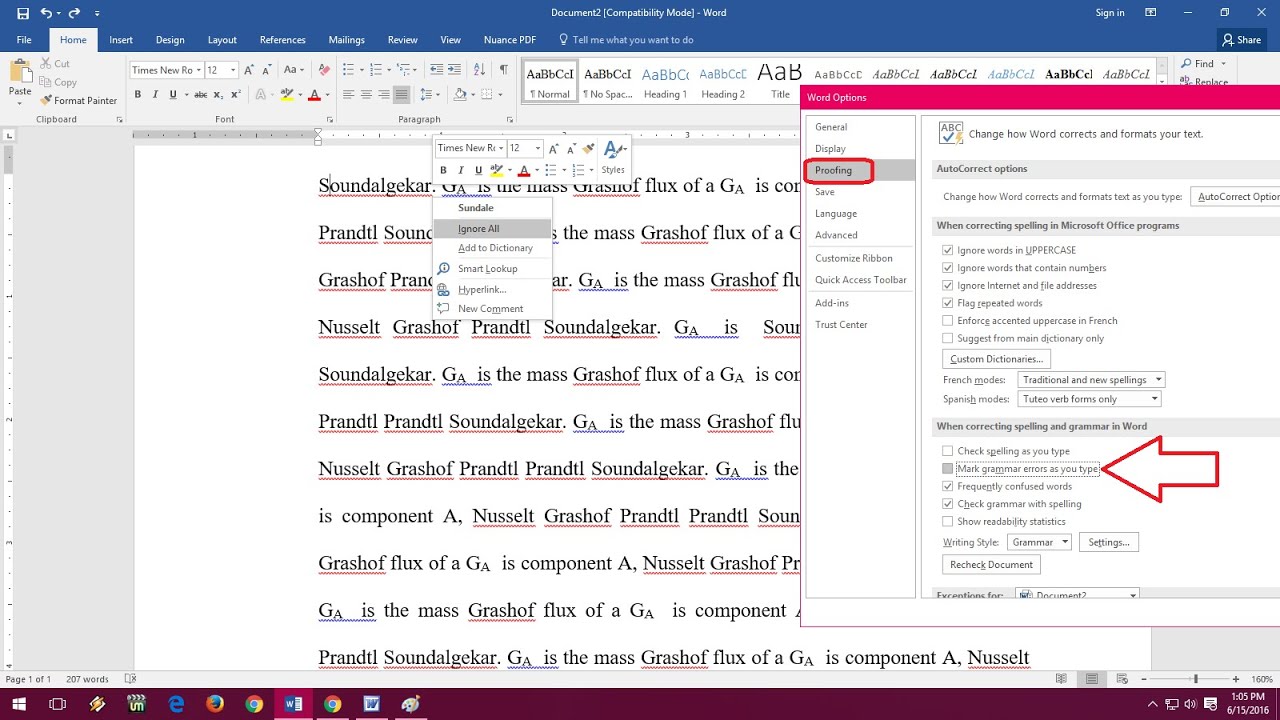
Turn off red wavy underlines for spelling errors. The Word options window opens select Proofing 5. When using Words Track Changes you may see a vertical red line on the left side.
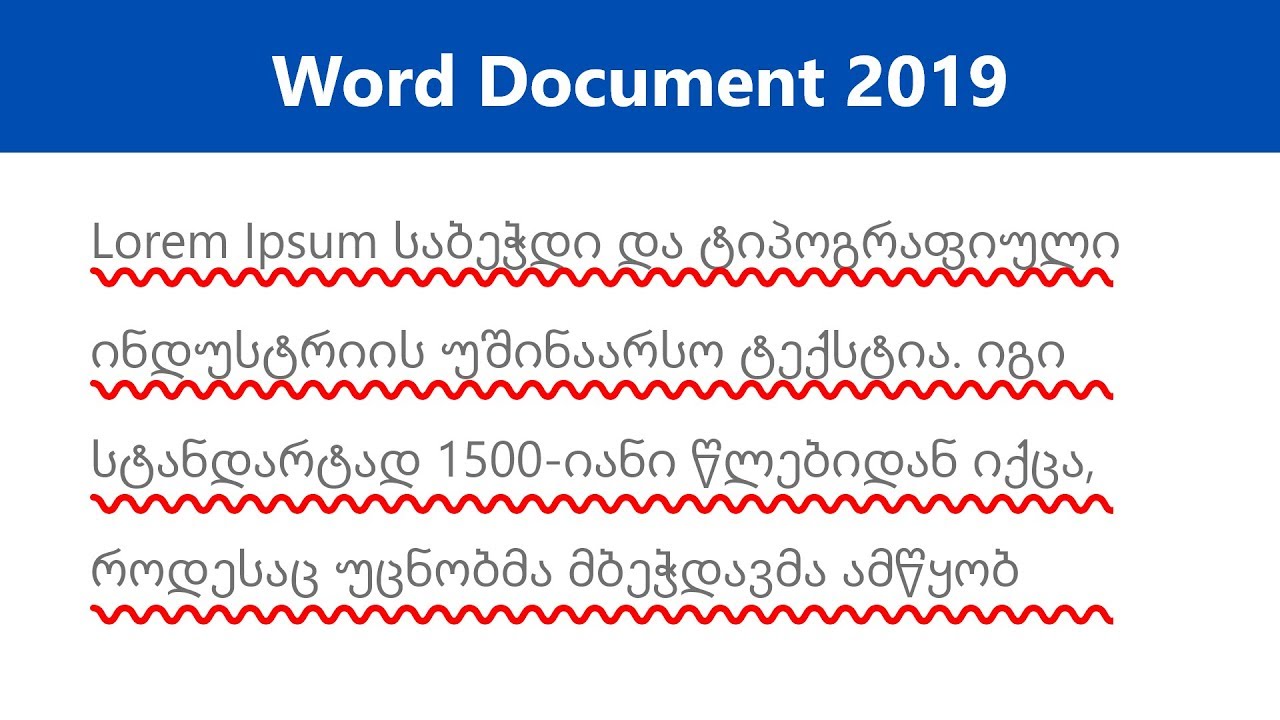
These wavy lines are actually informing you that theres something wrong with your words or sentences. Click Review Track Changes. Highlight all your text including the tiny bit of grey that goes over the dotted lines.
Go to Display Go to Page borders Borders click none in Settings then OK. Try going to Word Options - Proofing and unchecking Mark grammar errors as you type and maybe a few more of the options there if that doesnt work. Click immediately above one of the lines.
Go to File Options. To remove the extra paragraph symbols do the following. Its automatic but not always accurate.
On the Home tab in. Select Options on the File menu. Choose Main Tabs in the Customize Ribbon dropdown menu.
To get rid of the red line which shows which parts of the text or all of it contain tracked changes click the down arrow on the Accept button and click Accept All Changes. Grammar check errors and contextual spelling errors are also marked with blue squiggly lines and in that respect this Word Tip is out of date. In these instances there are three ways you can handle the situation.
On the Home tab of the ribbon in the Paragraph group click the dropdown arrow on the right hand side of the Borders button and select No. The only way to do that is with a macro. Go to Home and select the Font Dialog Box Launcher and then select the Font tab.
Select Proofing from the options given. Select the text in which you want to remove symbols. Click the Track Changes button to enable Track Changes.
A subscription to make the most of. You can easily remove these paragraph symbols. The above steps will not prevent the red squiggly lines from appearing under misspelled words.
Press AltF11 to open the VBA window in Word. In the Exceptions for section select the document in which you dont want to see. First you can press CtrlZ right after you pressed Enter and Word added the line.
All text has red wiggly lines under them. Disable Red Squiggly Lines. Remove all horizontal lines with VBA code.
Just a note to let you know that this advice continues to be most helpful. Start by pressing CTRL-A to select your whole document. In this case the line is removed and your characters remain.
If you want to delete multiple lines or connectors select the first line press and hold Ctrl while you select the other lines and then press Delete. To get rid of the red line which shows which parts of the text or all of it contain tracked changes click the down arrow on the Accept button and click Accept All. Make sure that the checkbox on Check spelling as you type is checked.
On the Proofing tab click the Hide spelling and grammar errors checkbox. Click Run button or press F5 to apply VBA directly. If I run a spell check nothing is picked up.
First open the Word document and switch to Review tab. Click Module from Insert tab and insert the code into the Module window. To remove it go to the Review tab and click on Accept.
Select File Options Customize Ribbon. 2018 update For Microsoft 3652016. So how to remove all these wavy lines in Word.
This feature places a red line in the margins next to any edited text. And all horizontal lines have been deleted from the document. By default the symbols will be removed from the whole document.
How To Red Line In Word. Click on the Tools menu at the top of the window then on Language and then on Set LanguageIf you dont see Language in the menu double-click on the Tools menu to expand the list. Click the File menu 3.
In other instances you might have really wanted the characters in your document not the line that Word thought you wanted. Replace Blank Spaces in Word.
How To Remove Red Wavy Underlines In Word Document 2019 Youtube
I Cannot Make The Red Vertical Lines On The Left Side Disappear
Remove Red And Green Underlines In Word Mike S Draft Article Bin
Turn Off Red Wavy Underlines For Spelling Errors Microsoft Powerpoint 2016
Remove Red And Green Underlines In Word Mike S Draft Article Bin
2016 Microsoft Word Remove Editor Comments Papercheck
Remove Red And Green Underlines In Word Mike S Draft Article Bin
How To Remove Turn Off Red Green Blue Lines In Ms Word Spelling Errors Youtube
How To Remove Red And Green Wavy Underlines In Word Document
Post a Comment for "How To Remove All Red Lines In Word 2016"